Keeping multiple data systems in sync is always challenging. The task becomes especially tricky when the data systems in question call certain objects or fields different names. Or even worse, if they structure data in a fundamentally different way.
This guide introduces Remix, a data streaming tool designed to tackle this challenge by walking through two examples of its first supported use case: Replicating product data between PostgreSQL and a Stripe account.
Please note that Remix is currently under development, and we are not pushing "versioned" releases yet. We will start making those releases when Remix is ready for general usage.
The problem
Let's get specific about the challenges presented by this seemingly simple task. To do this, we will explore two situations where companies need to sync product name and price data with Stripe. They are very different companies, and have correspondingly different needs and constraints:
AI startup
- Sells products around the world. Needs multi-currency support + automatic handling of different tax regimes.
- Writing and adapting software is in their nature. They are willing to conform their own data model to the way Stripe does things to make their lives easier. This means having separate
productsandpricestables. - Their main challenge is staying on top of currency exchange rates, different tax rates, reporting compliance, and all the challenges of selling overseas.
Local restaurant supply company
- Operates in a single country. All invoices are sent in a single currency.
- Product names and pricing data lives in a single table called
products. - IT systems and business processes are established. Doesn't want to make changes to their software.
- Main challenge is keeping the prices of their many food items, which are constantly changing according to market conditions, up to date, in more than one software system.
Despite having a "simpler" data model, the restaurant supply company actually has the greater data syncing challenge, as the structure of their data doesn't conform to Stripe's. We'll solve the startup's problem first, and work up to the supply company.
But first, let's talk about Remix, our tool that solves both of these challenges.
Introducing Remix
Remix is a free, open-source data streaming solution, written in Golang. It has three main objectives:
- Replicate data from one system to another, in real time, in a flexible way.
- Facilitate the curation of high quality AI training datasets.
- Encourage the creation of canonical data models that can be enforced acress your organization.
Consider following / starring the project's Github repo if you'd like to be updated when we starting pushing out versioned releases of the software.
Data Replication
Remix features a "fan-in, fan-out" architecture when replicating data. It pulls in data, transforms it to fit into predefined models that you define, and puts objects in a queue. Then, for each system that you want to push to, it transforms the objects to a format that the target system will accept, and pushes to it.
We call the process of transforming the data "remixing". Right now, remixing simply renames fields, changes data types, and builds idempotent upsert / delete commands.
Just remember, data is remixed on the way in from a system to fit your canonical data models, then remixed again on the way out to be accepted by other systems.
AI Dataset Curation
AI thrives on clean, standardized datasets. Remix facilitates the creation of those datasets by forcing you to define data models in a standardized way.
Once you've defined those models, Remix replicates data (which conforms to those models) to any number of storage systems. Depending on your needs, you might replicate data to traditional databases, a data warehouse, vector databases, or even systems used to serve large-scale AI training runs like VAST, Databricks, or S3.
Canonical Data Model Enforcement
Models and remixing logic are defined with JSON Schema and YAML, respectively. This declarative nature makes it easy to keep your models and transformation logic in source control, such as Github, and works great with automated deployment systems like Terraform or Ansible.
AI Startup: Generic data syncing challenges
Because this AI company is new, and writing software is in their nature, they've created two tables that correspond to Stripe's product and price objects. The SQL commands to create these tables are below:
CREATE TABLE products (
    id TEXT PRIMARY KEY,
    name TEXT NOT NULL,
    default_price_id TEXT UNIQUE
);

CREATE TABLE prices (
    id TEXT PRIMARY KEY,
    product_id TEXT NOT NULL,
    unit_amount INT NOT NULL,
    currency TEXT NOT NULL
);
And here are example product and price objects, as returned by Stripe's API:
-- product object
{
  "id": "prod_NWjs8kKbJWmuuc",
  "object": "product",
  "active": true,
  "created": 1678833149,
  "default_price": null,
  "description": null,
  "images": [],
  "marketing_features": [],
  "livemode": false,
  "metadata": {},
  "name": "Gold Plan",
  "package_dimensions": null,
  "shippable": null,
  "statement_descriptor": null,
  "tax_code": null,
  "unit_label": null,
  "updated": 1678833149,
  "url": null
}

-- price object
{
  "id": "price_1MoBy5LkdIwHu7ixZhnattbh",
  "object": "price",
  "active": true,
  "billing_scheme": "per_unit",
  "created": 1679431181,
  "currency": "usd",
  "custom_unit_amount": null,
  "livemode": false,
  "lookup_key": null,
  "metadata": {},
  "nickname": null,
  "product": "prod_NZKdYqrwEYx6iK",
  "recurring": {
    "interval": "month",
    "interval_count": 1,
    "trial_period_days": null,
    "usage_type": "licensed"
  },
  "tax_behavior": "unspecified",
  "tiers_mode": null,
  "transform_quantity": null,
  "type": "recurring",
  "unit_amount": 1000,
  "unit_amount_decimal": "1000"
}
A few things to note about the database tables:
The products table's id column is meant to be the id field in a Stripe product.
Stripe calls the price of something unit_amount, and it denotes the price in the lowest base amount of that currency. So, for Euros, US Dollars, and British Pounds, which are denominated in cents, you will need to multiply the price of everything by 100. For example, if your product costs $5.95, you would store that in Stripe as currency=USD and unit_amount=595. The reason for this is that it is much easier, computationally speaking, to work with integers than it is decimals.
As you can see, our AI startup has made their lives as easy as possible: The structure of their data is the same as Stripe's (separate product and price tables), and even the column names are the same. What could go wrong?
PostgreSQL And Stripe Data Streaming
First you need to understand how streaming data gets in and out of these systems.
For PostgreSQL, you'll be working with change data capture to pull changes from it, and INSERT, UPDATE, and DELETE SQL commands to push changes to it.
For Stripe, you'll be receiving webhooks whenever changes happen in your account, and you'll have to make JSON API calls to push changes to the account.
So, right off the bat, you'll need systems that can:
- Listen for PostgreSQL change data capture messages (Debezium or Airbyte are popular options)
- Listen for Stripe webhooks. You'll need to expose a public API endpoint, do SSL termination, validate Stripe is the one who sent you the hook, all before you even start parsing the data. AWS Lambda functions, or Event Bridge are a decent option here.
- Parse the incoming data from each system, understand what kind of change is being made (insert, update, delete), the reformat it into a message that the other system can accept. This will be custom code, bespoke to you.
- Generate a SQL command to make the change in PostgreSQL, or an API request to make the change in Stripe. This is also code that you'll have to write.
None of these things are trivial tasks, so even though this is the easiest use case possible, it will still be quite challenging to bootstrap and orchestrate all of these systems yourself.
Dog chasing its tail
And now let's talk about the first subtle "gotcha". Say you make a change to a product's price in Stripe, and the change is replicated to PostgreSQL. Now, PostgreSQL will report that a change was made in the price table, and we will pick that up in the CDC logs.
Unless we implement duplicate checking logic (which isn't easy to do correctly), we will then replicate the "change" back to Stripe, which will then report the change to us via a webhook, and on and on. The dog chasing it's tail.
What if we have one single difference in naming?
Say we created our prices table before starting to think about syncing automatically with Stripe, and instead of unit_amount, the price of something is called price in the table. It would be great to change it, but at this point a few other systems depend on the table having a column called "price". We could maybe create a view for those other systems to query, but we just want to move fast without changing our database schema or breaking existing systems.
We need some way to tell our database that the price changed, even though Stripe doesn't reports that data as "unit_amount" instead of "price".
Remix To The Rescue
Luckily, we made Remix for exactly this kind of situation. It solves all three problems mentioned:
- It's a single tool, configured with YAML and JSON. You don't need to learn multiple new systems, or write and maintain bespoke transformation code.
- It does automatic duplicate checking for you.
- It can account for naming differences.
We will demonstrate using Remix now, using Docker and a Stripe sandbox account.
Network setup
First, we'll need a Docker network for Remix and PostgreSQL to talk to each other on. Run the following command:
docker network create remix-test-network
PostgreSQL Setup
To follow along, you'll need PostgreSQL and Remix running in Docker, plus a Stripe sandbox account. We're going to replicate data in two ways, between Stripe and PostgreSQL.
First we'll deploy PostgreSQL in Docker, with the tables defined above and CDC enabled. Create a new directory, cd into it, and put the following file called postgresql.dockerfile inside it. This container image simply enables the WAL2JSON plugin, so we can get changes to our PostgreSQL tables in a structured fashion.
FROM postgres:15

# Install wal2json (uses apt for Debian-based images)
RUN apt-get update \
    && apt-get install -y postgresql-15-wal2json \
    && rm -rf /var/lib/apt/lists/*
Save that file, make sure you're in the same directory as it, and run the following command to build the Docker image.
docker build -t my-postgres:15 -f ./postgresql.dockerfile .
Next, let's run a PostgreSQL container with the correct WAL level, and a few other CDC configurations:
docker run --rm -d \
  --name test-postgres \
  --network remix-test-network \
  -e POSTGRES_USER=postgres \
  -e POSTGRES_PASSWORD=Mypass123 \
  -e POSTGRES_DB=postgres \
  -p 5432:5432 \
  my-postgres:15 \
  postgres -c wal_level=logical -c max_replication_slots=5 -c max_wal_senders=5 -c max_connections=100
Last, we need to create those tables. Here is a single cli command that will pass and run the CREATE TABLE SQL queries from above:
docker exec -i test-postgres psql -U postgres -d postgres <<'EOF'
CREATE TABLE IF NOT EXISTS products (
    id TEXT PRIMARY KEY,
    name TEXT NOT NULL,
    default_price_id TEXT UNIQUE
);

CREATE TABLE IF NOT EXISTS prices (
    id TEXT PRIMARY KEY,
    product_id TEXT NOT NULL,
    price INT NOT NULL,
    currency TEXT NOT NULL
);

DO $$
BEGIN
    IF NOT EXISTS (SELECT 1 FROM pg_publication WHERE pubname = 'my_pub') THEN
        CREATE PUBLICATION my_pub FOR ALL TABLES;
    END IF;
END
$$;
EOF
At this point, you should have a live PostgreSQL database running on your computer. Open up a client (psql, PGadmin, Datagrip, whatever) and run the following queries to ensure your tables were created successfully:
select * from products;

select * from prices;
You should see empty tables with the structure we spoke about. Here is what it looks like in PGAdmin4, which is the tool I'm using to query PostgreSQL:
Stripe Setup
We need a Stripe sandbox and an API key. In case this blog post ever gets out of date, here is the documentation on Stripe sandboxes.
Login to your Stripe account and mouse over the drop down in the top left that contains your company name and environment. Mouse over "Switch sandbox", then click "Create sandbox", or select a preexisting sandbox that you'd like to use.
Here is what it looks like on my web browser:

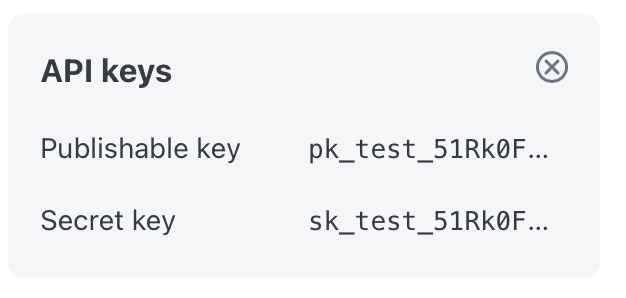
Once inside a sandbox, navigate to the "Home" tab, and copy the "Secret key". It should look something like sk_test_51Rk0F....
Again, here is what it looks like in my browser:
Now we have everything we need to sync between Stripe and PostgreSQL with Remix! Let's configure the tool, start it up, and watch it move some data.
Remix Setup
First, we need two kinds of files, schema files and remix files. For an in-depth discussion of these file types, visit Remix's Github repository.
At a high level, schema files are JSON Schema that you use to define canonical data models, which you then validate incoming data against. It makes it so you only replicate valid data.
Remix files allow you to specify which types of data should be replicated, to where, and how it should be transformed along the way.
First, we will create the schema files. Create a new subdirectory in your existing folder called models, and create two files in it:
models/product.json
{
    "title": "product",
    "type": "object",
    "properties": {
        "id": {
            "type": ["string", "null"]
        },
        "name": {
            "type": "string"
        },
        "default_price_id": {
            "type": ["string", "null"]
        }
    }
}
models/price.json
{
    "title": "price",
    "type": "object",
    "properties": {
        "id": {
            "type": ["string", "null"]
        },
        "product_id": {
            "type": ["string", "null"]
        },
        "unit_amount": {
            "type": "number"
        },
        "currency": {
            "type": "string"
        }
    }
}
As you can see, these schema files match closely with the tables we created in PostgreSQL, and the objects returned by Stripe. If you'd like to learn more about JSON Schema, the format Remix uses to define schemas, visit json-schema.org.
Next, we need remix files for both PostgreSQL and Stripe. Create another subdirectory (beside, not inside the systems directory) called systems, and drop the following two YAML files in there:
systems/prod-db.yaml
prod-db:
  type: "postgresql"
  dsn: "postgres://postgres:Mypass123@test-postgres:5432/postgres?sslmode=disable"
  replication_dsn: "postgres://postgres:Mypass123@test-postgres:5432/postgres?sslmode=disable&replication=database"
  max_open_connections: 10
  max_idle_connections: 10
  max_connection_idle_time: 30s
  rate_limit: 10
  rate_bucket_size: 100

  receive_mixer:

    public.products:
      product:
        id:
          field: id
        name:
          field: name
        default_price_id:
          field: default_price_id

    public.prices:
      price:
        id:
          field: id
        product_id:
          field: product_id
        price:
          field: unit_amount
        currency:
          field: currency

  push_mixer:
    product:
      public.products:
        id:
          field: id
          search_key: true
        name:
          field: name
        default_price_id:
          field: default_price_id

    price:
      public.prices:
        id:
          search_key: true
          field: id
        product_id:
          field: product_id
        unit_amount:
          field: price
        currency:
          field: currency
systems/payment-gateway.yaml
payment-gateway:
  type: "stripe"
  use_cli_listener: true
  api_key: "API_KEY_HERE"
  rate_limit: 10
  rate_bucket_size: 100

  receive_mixer:
    product:
      product:
        id:
          field: id
        name:
          field: name
        default_price:
          field: default_price_id

    price:
      price:
        id:
          field: id
        product:
          field: product_id
        unit_amount:
          field: unit_amount
        currency:
          field: currency

  push_mixer:

    product:
      products:
        id:
          field: id
          search_key: true
        name:
          field: name
        default_price_id:
          field: default_price

    price:
      prices:
        id:
          field: id
        product_id:
          field: product
        unit_amount:
          field: unit_amount
        currency:
          field: currency
Replace api_key value in payment-gateway.yaml with your Stripe sandbox secret key.
For theory and definition of what these files are doing, and why they allows us to rename fields, read the "Understanding Remix" section of the Remix Readme.
Basically what it is doing is renaming the unit_amount field in our canonical data model to price whenever it is pulling data from, or pushing data to, our PostgreSQL DB. It supports more complex use cases than this, but let's continue with this example.
At this point, you should go back to the top level of the directory you created, which has a file called postgresql.dockerfile, and two directories called systems and models, which contain the files shown above. If that's all true, it's time to start Remix!
Remix Startup
The easiest way to run the tool is the official Remix Docker Image.
You need to provide the directories with the files you just created. The easiest way to do that is by mounting the directories we should created to the Docker image. Here is a command that does that on system startup, tells Remix where to find those directories, and also calls the container image "remix":
docker run \
    --network remix-test-network \
    -v $(pwd)/systems:/systems \
    -v $(pwd)/models:/models \
    -e SYSTEMS_DIR=/systems \
    -e MODELS_DIR=/models \
    -e PORT=4000 \
    --name remix \
    sqlpipe/remix:latest
Assuming everything ran OK, you should now be replicating back and forth between your PostgreSQL DB and Stripe! Let's make a few simple changes to test.
Testing Replication
First, let's create a product in Stripe. Go to the "Product catalog" tab.
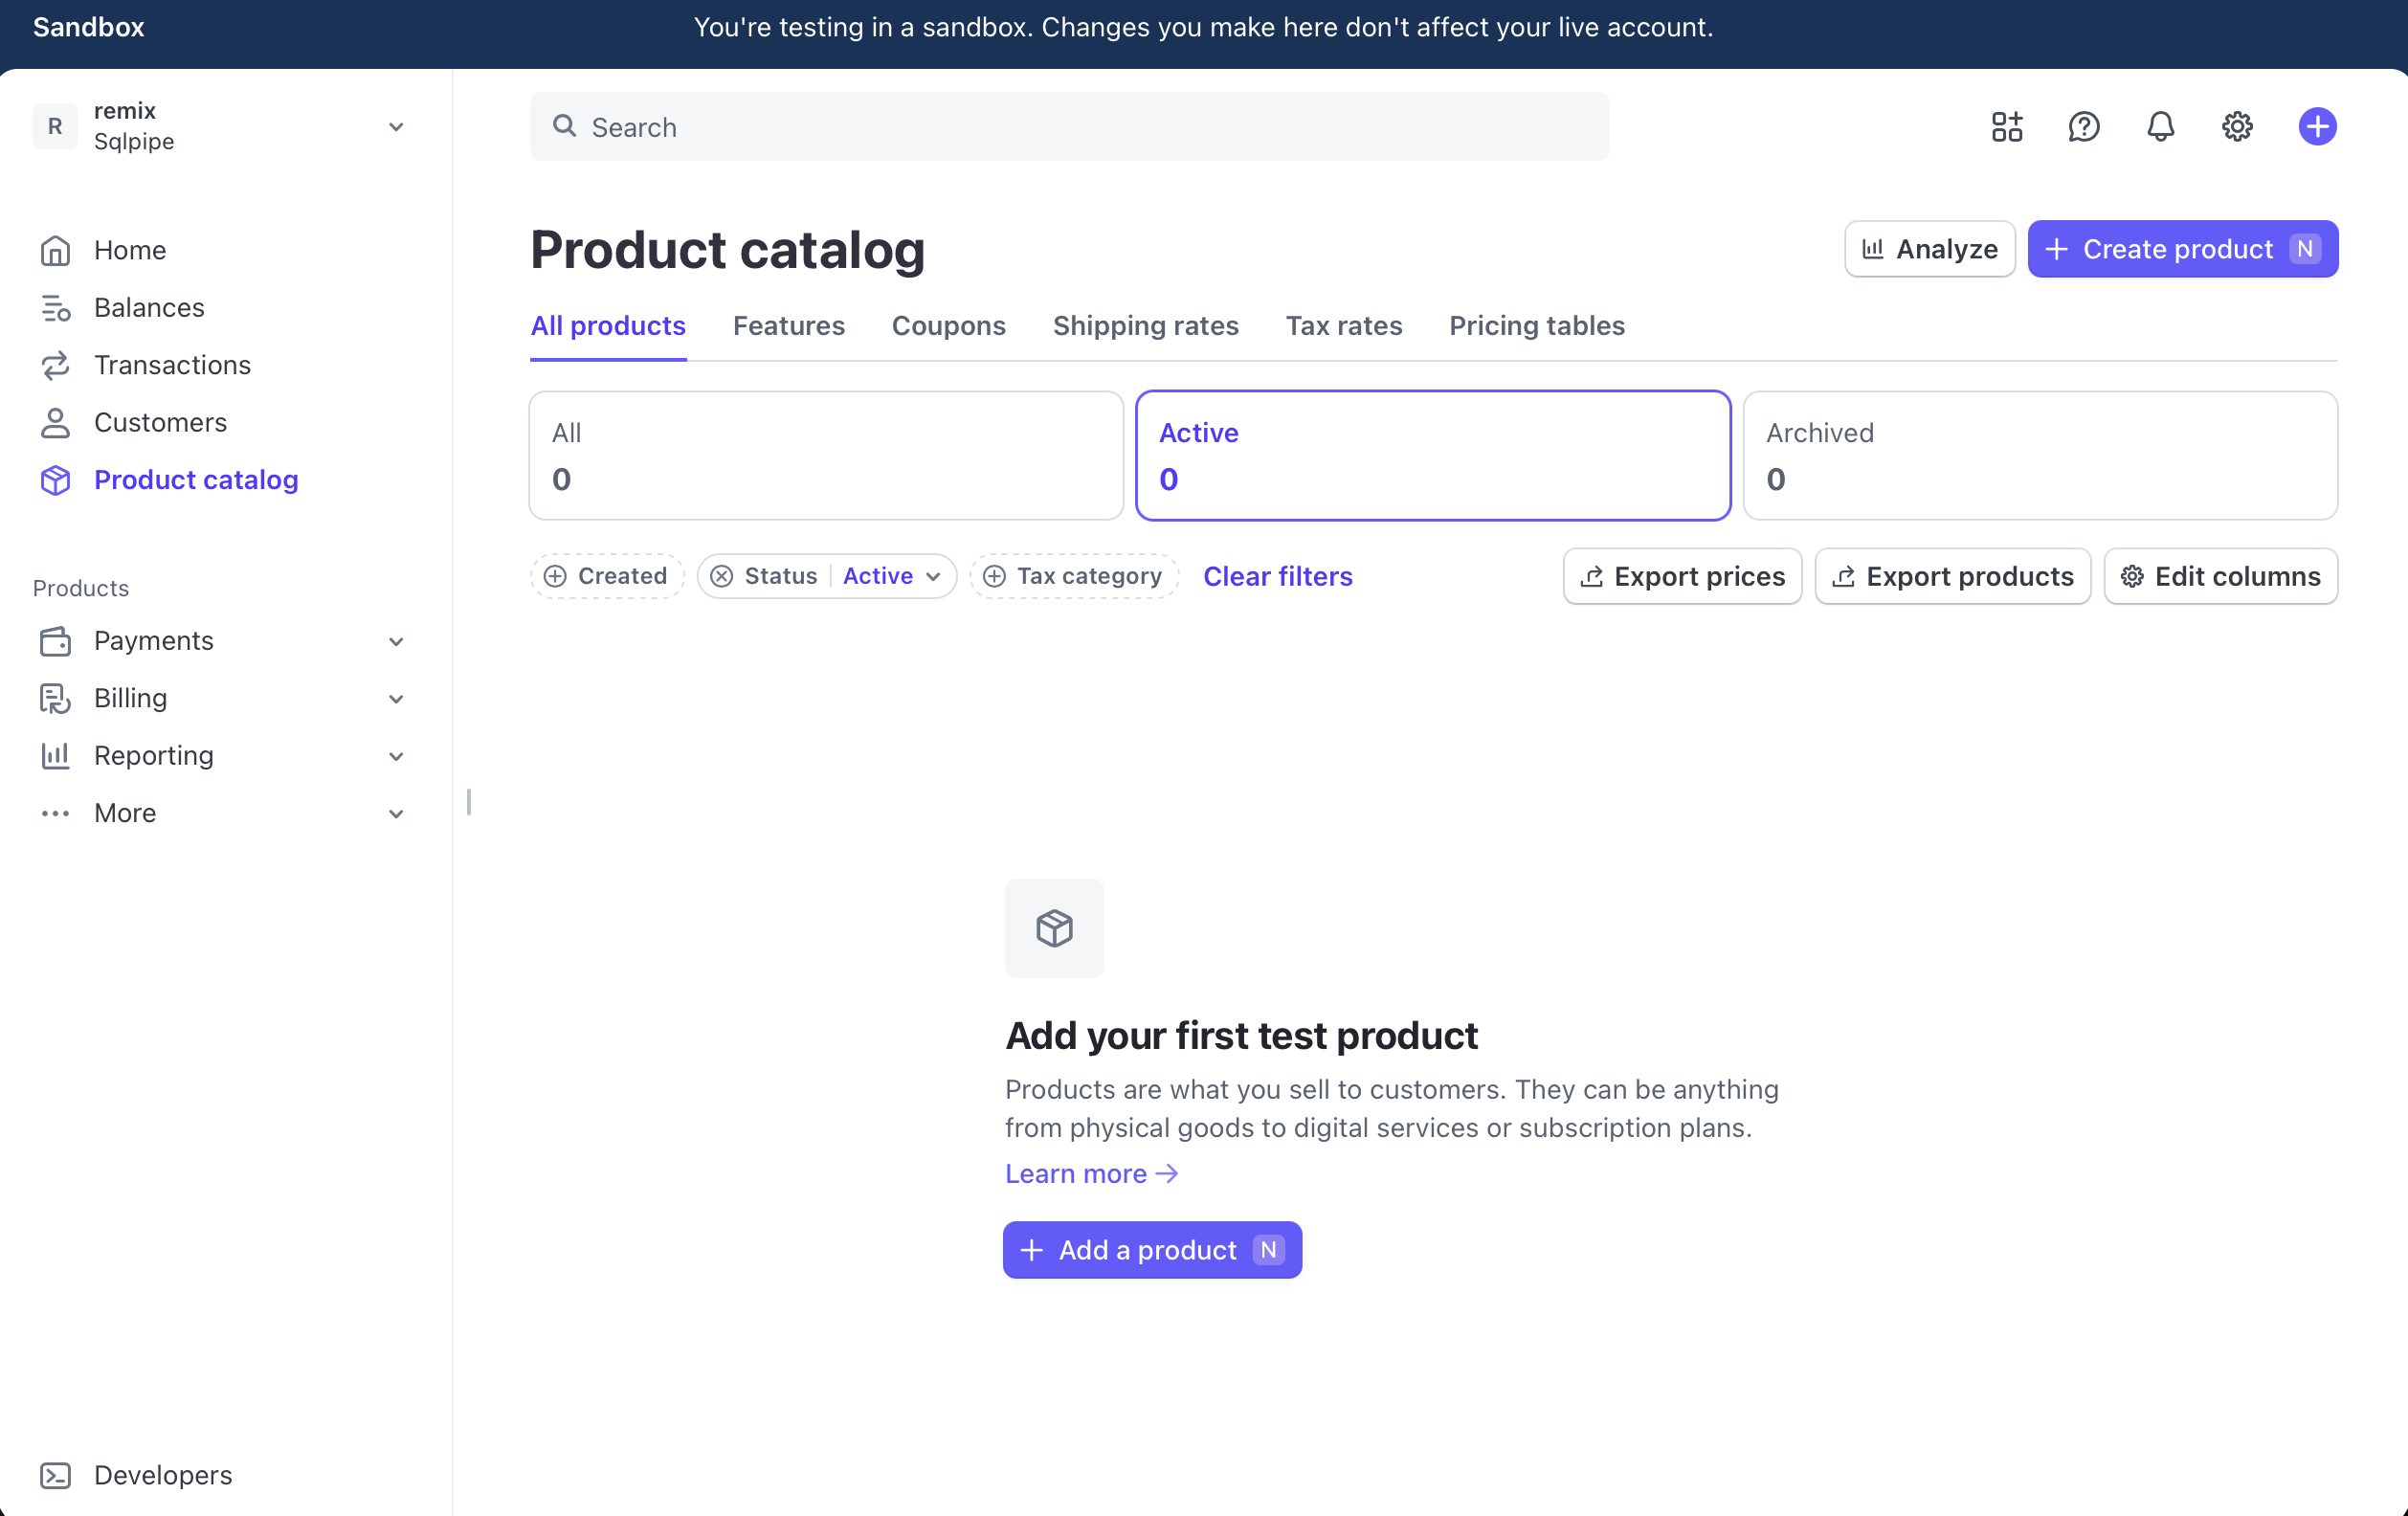
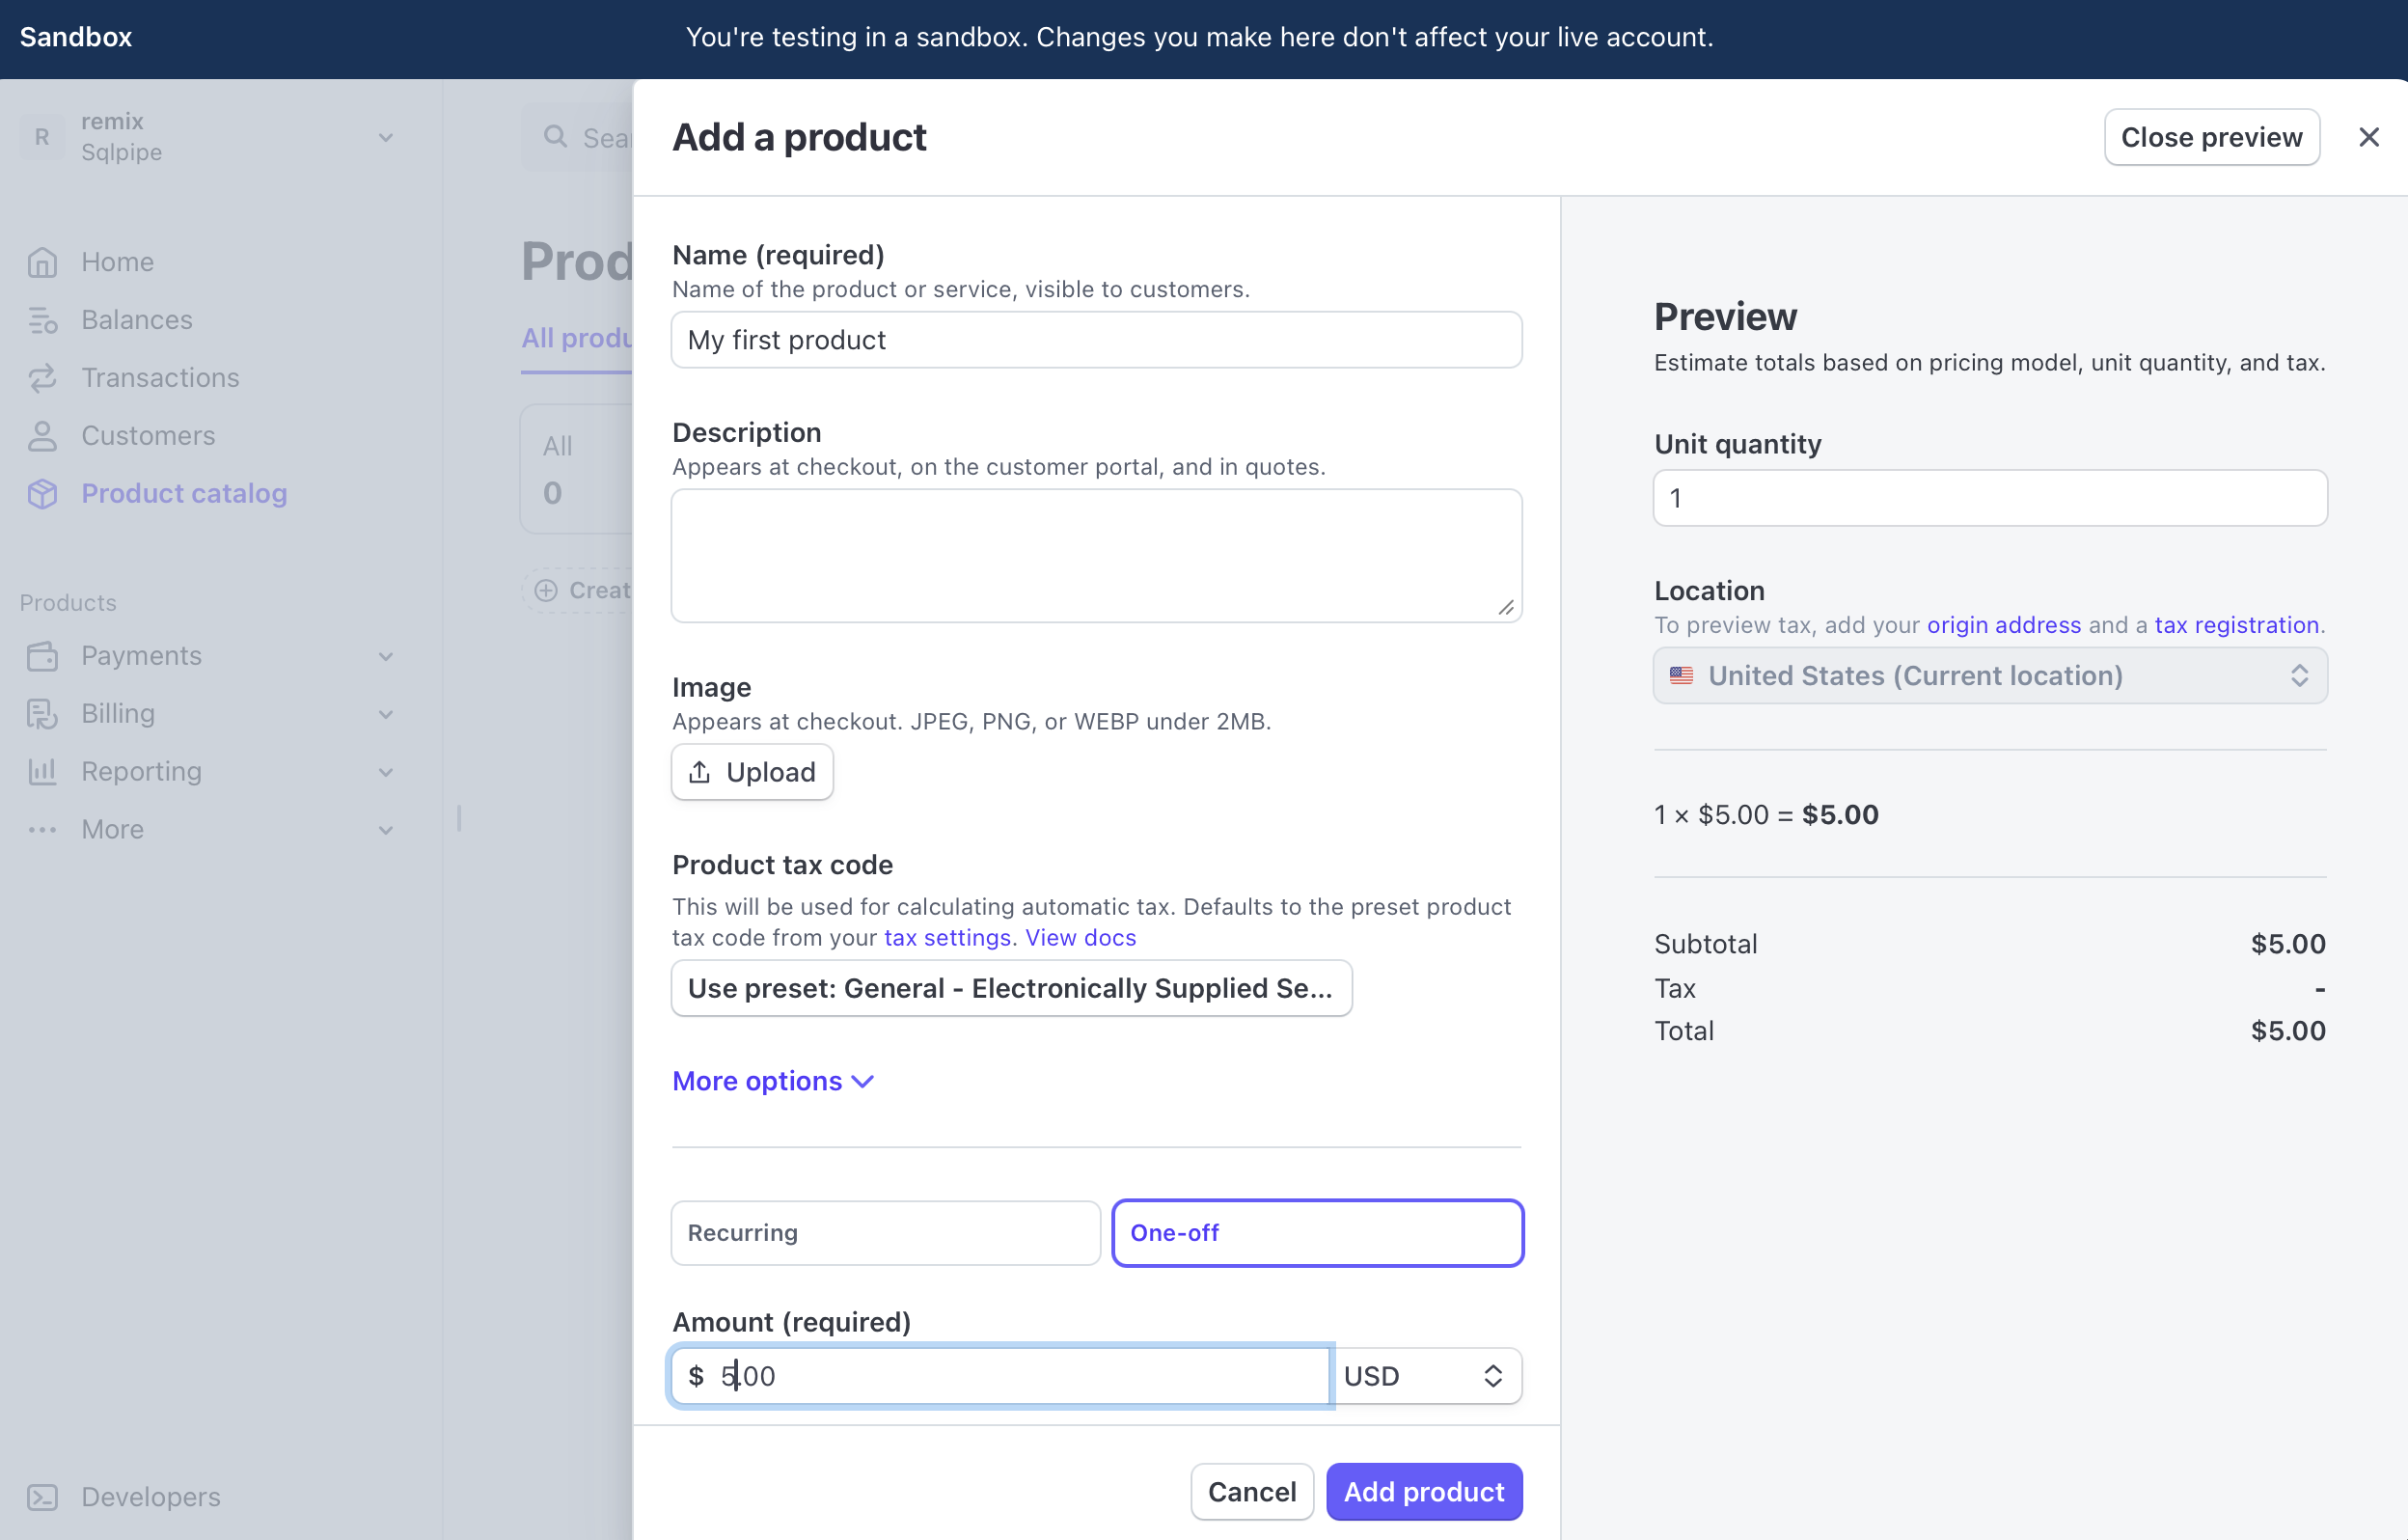
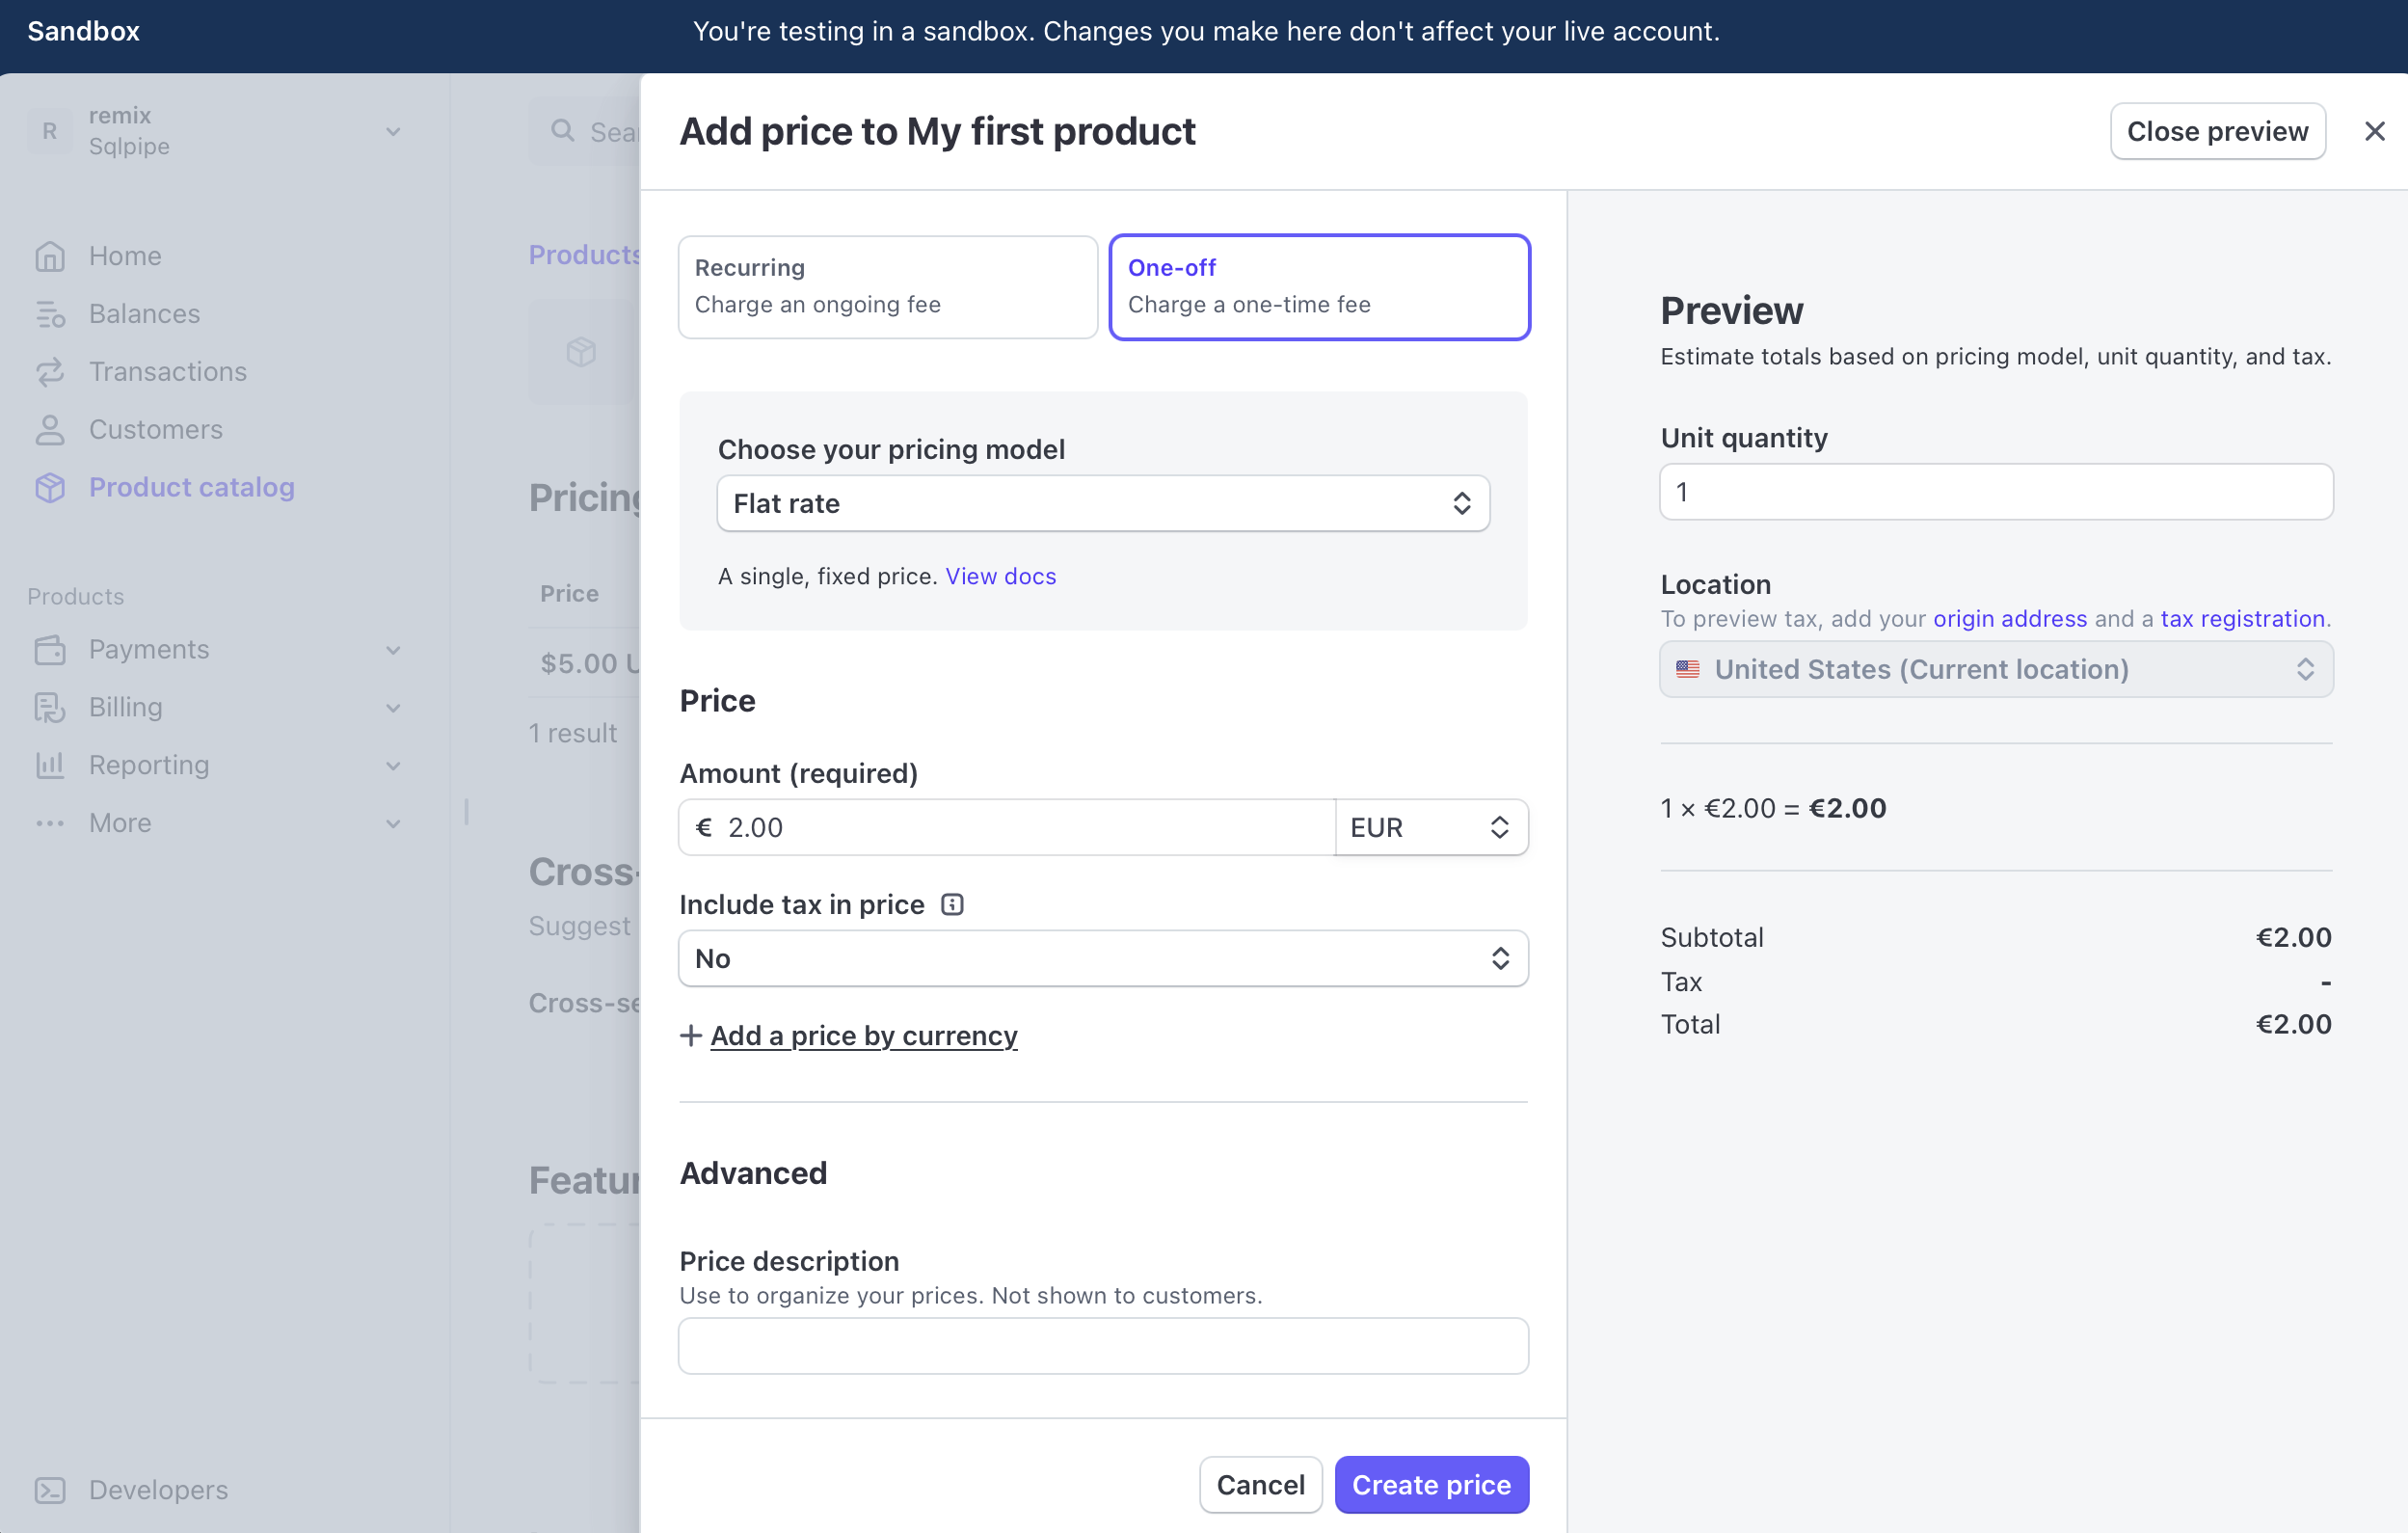
Click "Create product". Enter a name, a one-off price, and click "Add product".
Click back over to the tool you're using to query PostgreSQL, and select from the products and prices tables. You should see your data! Sometimes it takes a second for it to propagate.
select * from products;

select * from prices;
Here is what I see in the products table:
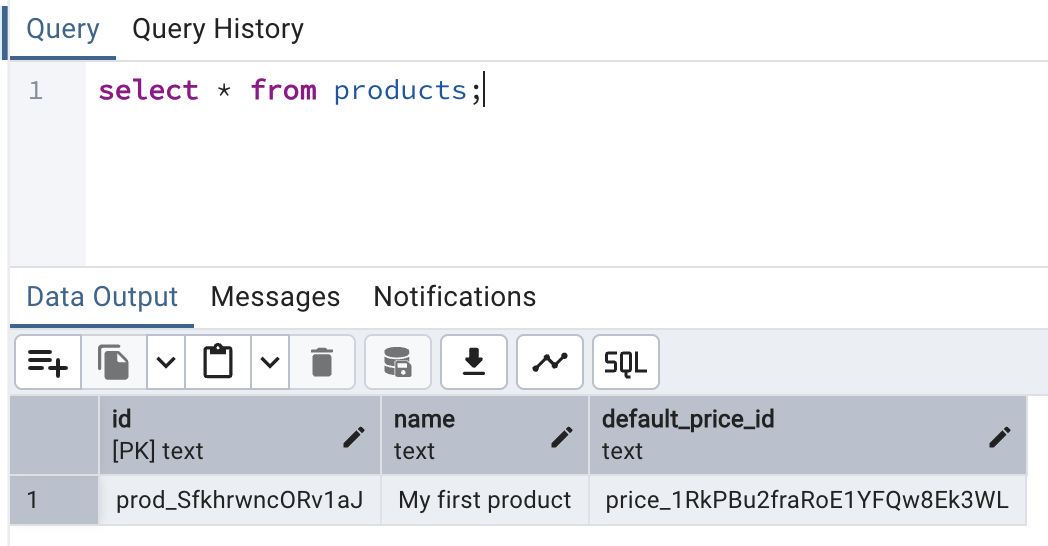
And here is what's in the prices table:

Let's try adding another price, maybe in Euros. Click on the product in your Stripe product catalog, and add a new price.
Now, run the prices query again.
select * from prices;
And here is what I get:
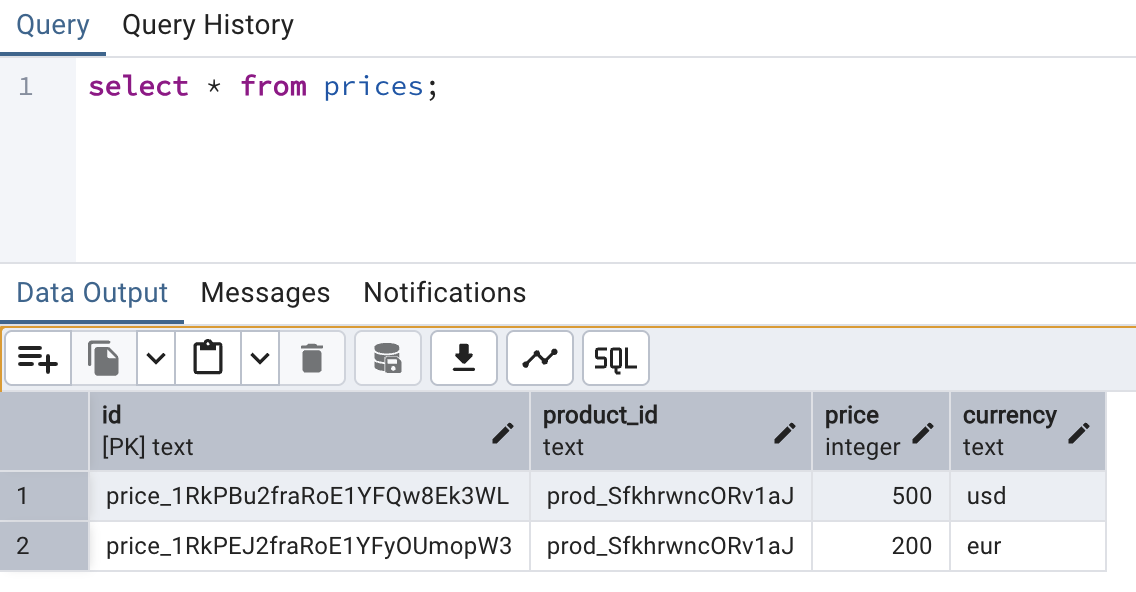
As you can see, we have two prices, with an FK to the products table. We could easily use this in our web app, along with IP / location data, to serve the correct price to a given user of our website.
If you like, try updating the name of the product in the database and watch it sync to Stripe. Or, try deleting the object in Stripe and watching that sync to PostgreSQL!
Restaurant Supply Company: Adapting To Legacy IT Systems
The restaurant supply company started building their database long before they thought about integrating with Stripe, and they only have one table: products. Here is a create table command showing what that table looks like:
CREATE TABLE products (
    id bigserial PRIMARY KEY,
    stripe_id TEXT UNIQUE,
    product_name TEXT NOT NULL,
    price int,
    -- they have many other columns, but these are the ones we care about
)
We already talked about the difficulty of syncing data in general, in the AI startup company example. Here, we will focus on one challenge: We need to reshape data from Stripe to fit into this database, but how?
If you'd like to follow along, you'll need to drop the products and prices tables in PostgreSQL, and delete the Remix container.
PostgreSQL Table Alterations
Run these two queries to delete the previous tables (DEFINITELY make sure you're pointed at the correct, local database :-)
drop table products;
drop table prices;
Then, create the new table:
CREATE TABLE products (
    id bigserial PRIMARY KEY,
    stripe_id TEXT UNIQUE,
    product_name TEXT NOT NULL,
    price int
);
Remix Setup 2
Next, we'll need to create a new JSON Schema file, and two new Remix files. I recommend just deleting the models/price.json file, and replacing the text in models/product.json with the following:
{
    "title": "product",
    "type": "object",
    "properties": {
        "id": {
            "type": ["number", "null", "string"]
        },
        "stripe_id": {
            "type": ["string", "null"]
        },
        "name": {
            "type": "string"
        },
        "price": {
            "type": ["number", "null"]
        }
    }
}
Now, replace systems/prod-db.yaml with:
prod-db:
  type: "postgresql"
  dsn: "postgres://postgres:Mypass123@test-postgres:5432/postgres?sslmode=disable"
  replication_dsn: "postgres://postgres:Mypass123@test-postgres:5432/postgres?sslmode=disable&replication=database"
  max_open_connections: 10
  max_idle_connections: 10
  max_connection_idle_time: 30s
  rate_limit: 10
  rate_bucket_size: 100

  receive_mixer:
    public.products:
      product:
        id:
          field: id
        stripe_id:
          field: stripe_id
        product_name:
          field: name
        price:
          field: price

  push_mixer:
    product:
      public.products:
        id:
          field: id
          search_key: true
        stripe_id:
          field: stripe_id
          search_key: true
        name:
          field: product_name
        price:
          field: price
And replace payment-gateway.yaml with:
payment-gateway:
  type: "stripe"
  use_cli_listener: true
  api_key: "API_KEY_HERE"
  rate_limit: 10
  rate_bucket_size: 100

  receive_mixer:
    product:
      product:
          id:
            field: stripe_id
          name:
            field: name
          metadata.id:
            field: id
    price:
      product:
        product:
          field: stripe_id
        unit_amount:
          field: price

  push_mixer:
    product:
      products:
        id:
          field: metadata[id]
        stripe_id:
          field: id
          search_key: true
        name:
          field: name
Don't forget to paste in your API key.
Remix Startup 2
First, remove the old Remix container:
docker container rm -f remix
And re-run the startup command, which is the same as before:
docker run \
    --network remix-test-network \
    -v $(pwd)/systems:/systems \
    -v $(pwd)/models:/models \
    -e SYSTEMS_DIR=/systems \
    -e MODELS_DIR=/models \
    -e PORT=4000 \
    --name remix \
    sqlpipe/remix:latest
Once it's running, create a product in the Stripe dashboard as before. Wait a few seconds, and query the products table in PostgreSQL. You should see your product, *and* the price, synced to it. How does it do this?
select * from products;
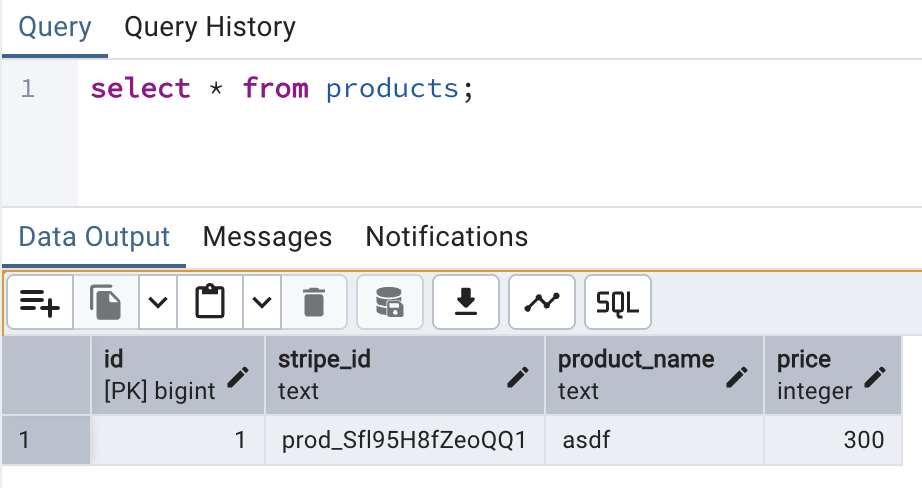
Take a look back at the receive_mixer in payment-gateway.yaml. Notice how it has two keys right below it - product and price? This is telling Remix that it needs to listen for two object types from Stripe - products and prices.
- Whenever a product object comes in, it needs to create (or update) a product object.
- Whenever a price object comes in, it also needs to create (or update) a product object.
Because both objects will share the field stripe_id, we are able to combine both incoming webhooks to create a single record in our database. We have solved our data structure issue!
Now, whenever a new price is created for a product in Stripe, it will update the product in our database to match. We can now create and manage product information in one place, instead of two.
Conclusion
Remix is a new tool that introduces a new paradigm of declarative data movement and transformation. The first use case we are supporting is Stripe to PostgreSQL and back, and we will be spending time refining this particular process.